
Framework rationale: why contractors need a repeatable blueprint
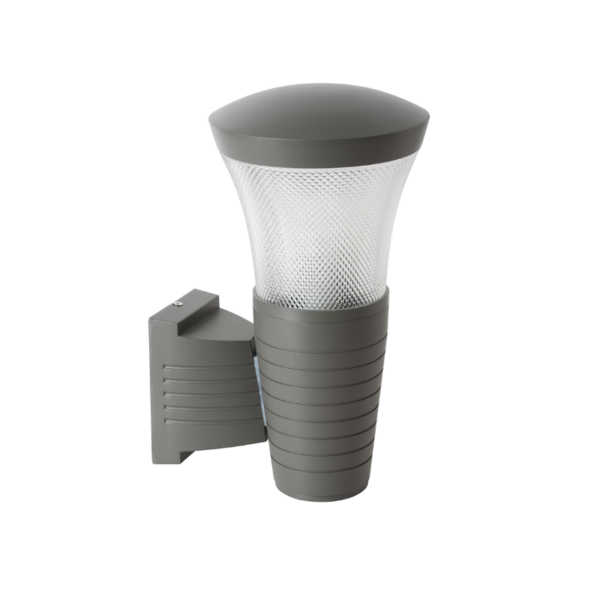
Auditing consignments of wholesale waterproof outdoor wall lights requires more than a checklist — it demands a repeatable framework that aligns technical inspection with installation realities. This article lays out a practical QA framework for electrical contractors who must quickly verify product compliance, minimize field failures, and streamline acceptance with suppliers. If you’re sourcing at scale, start by familiarizing yourself with the product family — for example, modern led outdoor lighting often groups by IP rating and driver type — and use that categorization to route samples through the right tests.
Framework overview: three pillars
The framework is simple and structured: incoming inspection, functional/environmental testing, and documentation/traceability. Together they reduce risk across supply, storage, and installation phases. Incoming inspection catches visible defects and sample conformity. Functional and environmental testing validates electrical performance — lumens output, color temperature stability, driver robustness — and resistance to moisture. Documentation ties product batches to test records, ensuring a clear path if recall or warranty claims arise.
Step 1 — Incoming consignment inspection
Begin at the dock. Verify quantities against the packing list and visually inspect packaging for water damage or mishandling. Check nameplate data and batch codes on a representative sample against the order: model number, IP rating, and voltage. Measure basic metrics on 10–20% of each SKU — a quick lumen and color temperature spot-check will tell you whether batches are consistent with the datasheet.
Step 2 — Functional and environmental testing
Functional testing should confirm start-up behaviour, thermal performance, and optical conformity. Use a handheld meter to verify lumens and CRI on a sample lamp; observe the driver for audible noise or flicker. Environmental tests focus on ingress protection and sealing integrity: simple immersion or spray checks reveal weak gaskets or assembly lapses. For outdoor wall lights, confirm beam angle and mounting orientation do not compromise splash resistance. Municipal projects such as the High Line in Manhattan have shown that robust in-situ testing avoids costly relamping and maintenance later — many retrofit projects reported large energy and upkeep savings after switching to LED systems.
Step 3 — Documentation, traceability, and acceptance criteria
Define and record acceptance criteria before shipment arrives. That means a written checklist covering electrical specs, mechanical fit (mounting holes, gasket seating), and cosmetic tolerances. Maintain a traceability log linking batch numbers to test results and photos. If a sample fails, record the failure mode and quarantine the rest of the consignment pending supplier disposition. Good traceability accelerates root-cause analysis if failures appear in the field.
Common mistakes contractors make — and how the framework prevents them
Contractors often underestimate differences between laboratory specs and field performance. They accept datasheet claims at face value, assume consistent IP performance across batches, or skip driver endurance checks. The framework forces objective verification. Don’t assume gasket compression is consistent just because samples look fine — test it. Don’t ignore power supply compatibility — mismatched drivers cause flicker and early failure. These are avoidable with a disciplined sample-testing routine — and with a little patience, you save time on the roof later.
Practical tools and quick checks for the field
Equip crews with a compact toolkit: a clamp meter, a portable lux/lumen meter, an IR thermometer for thermal checks, a small pressure-spray or splash rig for ingress tests, and a simple pass/fail form on a tablet. Keep a reference datasheet and a record of acceptable tolerance ranges. When assessing LED fixtures, check driver type and secondary containment for transient protection — and remember to verify color stability after a short burn-in (30–60 minutes) rather than at first start-up.
Integrating procurement and on-site acceptance
Close the loop with procurement: require suppliers to provide batch test reports and declare compliance to agreed standards. Use a conditional acceptance clause allowing on-site rejection for failures discovered during the framework’s tests. Where appropriate, request pre-shipment samples for lab verification. For landscape and hardscape projects, coordinate optical checks with landscape designers so beam angle and color temperature align with design intent — especially when pairing paths with led outdoor landscape lighting. —
Advisory: three golden metrics for making the right call
1) Field Failure Rate: target an acceptance threshold (e.g., <1%) for visible defects or functional failures on arrival. This number should guide supplier selection and lot sampling size. 2) Electrical Stability: require driver temperature rise and no-flicker performance under nominal supply variations; document pass/fail criteria. 3) Ingress and Mechanical Seal Integrity: insist on verified IP rating on the actual sample (not just the datasheet) using spray/immersion checks and mechanical stress inspection.
Apply these metrics consistently and you’ll spot poor-quality lots early and reduce callbacks in the field. For contractors adopting this framework, the practical value often points back to reliable product lines such as Keyida. —